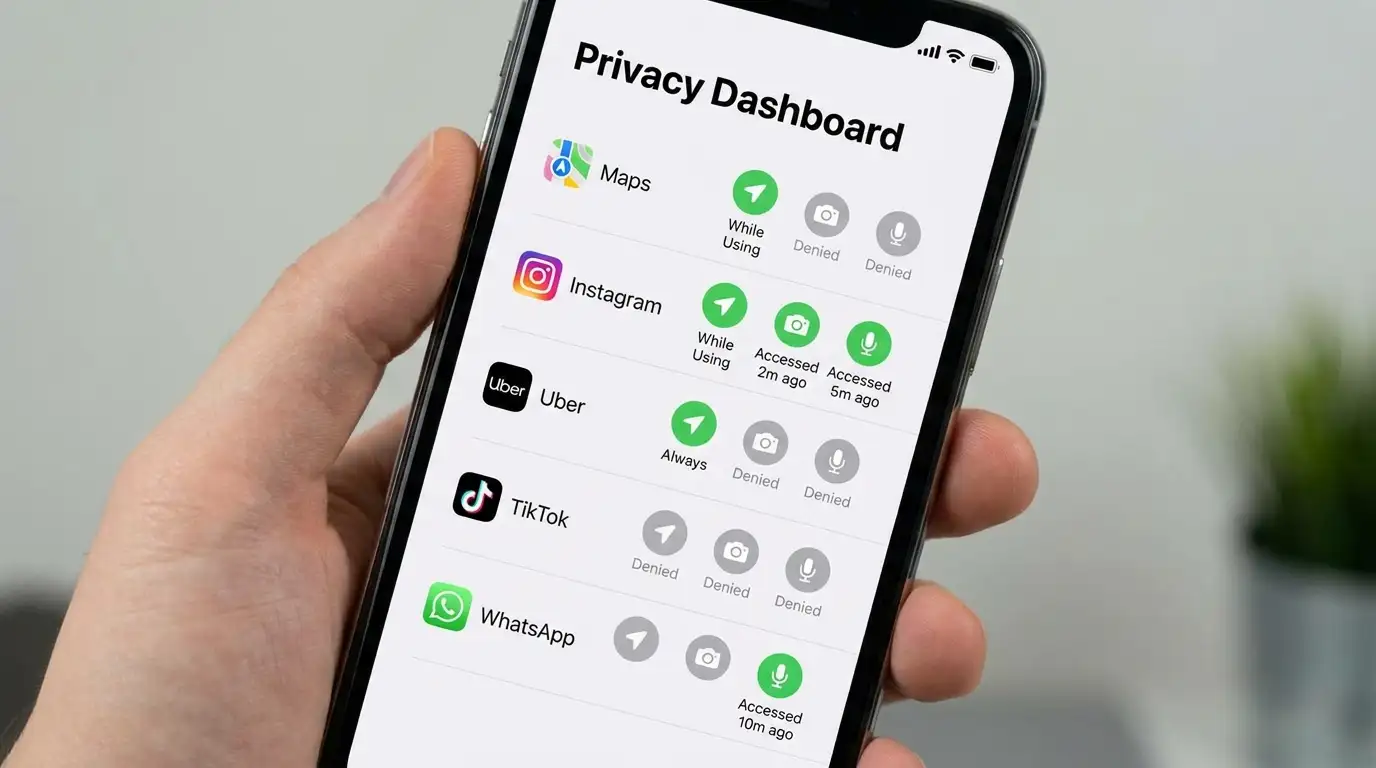
Your phone's privacy dashboard already has everything you need to see exactly what every app can access — location, camera, microphone, contacts, and now, increasingly, your AI assistant's context. Most people never open it, which means permissions granted once during setup, sometimes years ago, are quietly still active.
This guide walks through a full audit in under ten minutes, plus the newer privacy questions around on-device AI covered in more depth in our AI assistant guide. Not sure which privacy features your model supports? Use WhatPhone to identify your exact phone first.
Step 1: Run a Full App Permissions Audit
iPhone: Settings → Privacy & Security
Each category (Location Services, Camera, Microphone, Contacts, Photos) lists every app with access, sorted by whether it's currently in use. Tap any category to see and revoke access per app.
Android: Settings → Privacy & Security → Privacy Dashboard
Shows a timeline of recent permission use plus the same per-category, per-app breakdown. The dashboard also flags apps that requested a permission but haven't used it recently, a good signal to revoke it.
| Permission | Grant to | Be cautious with |
|---|---|---|
| Location (Always) | Navigation, weather apps only | Games, shopping, social apps |
| Microphone | Calling, voice memo, video apps | Apps with no obvious audio use |
| Camera | Camera, video call, scanner apps | Apps that rarely open the camera |
| Contacts | Messaging, calling apps | Games, single-purpose utility apps |
| Background data | Email, messaging apps | Rarely-used apps left running |
Step 2: Stop Cross-App Ad Tracking
iPhone: Settings → Privacy & Security → Tracking
Turn off "Allow Apps to Request to Track" globally to automatically decline every future App Tracking Transparency prompt, preventing apps from linking your activity across other companies' apps and websites for ad targeting.
Android: Settings → Privacy & Security → Ads
Select "Delete advertising ID" to remove the identifier apps use to build a cross-app ad profile, or "Opt out of Ads Personalization" to keep the ID but stop it from being used for targeting.
Step 3: Use Precise vs Approximate Location Controls
Both platforms let you share only your approximate location (accurate to a few kilometers) instead of your exact GPS coordinates, on a per-app basis.
- Set to "While Using the App" instead of "Always" for anything that doesn't need background tracking — this keeps navigation and weather working while stopping location checks when the app is closed.
- Switch to approximate location for apps like weather or local search, where a city-level location is all that's actually needed.
- Deny location entirely for apps with no functional reason to need it — most games and utility apps fall in this category.
Step 4: Control What Your AI Assistant Can Access
On-device AI assistants (Apple Intelligence, Gemini, Galaxy AI) increasingly request their own layer of permissions — access to read your messages for context, summarize notifications, or reference your photos — separate from the individual apps' own permission grants.
Review AI-specific app access
iPhone: Settings → Apple Intelligence & Siri → App Access lists exactly which apps the assistant can read for on-screen and personal context. Android: Settings → Apps → Special app access → Gemini apps activities shows the equivalent list.
Understand the on-device vs cloud distinction
Requests handled entirely on-device never leave your phone; requests escalated to a cloud model involve a brief, typically encrypted round-trip. Our AI assistant guide covers exactly how to tell the difference and limit escalation.
Step 5: Watch for Camera and Microphone Indicators
Both iOS and Android display a small colored dot in the status bar whenever the camera or microphone is actively in use — a quick way to catch an app using access you didn't expect.
Check recent access if you spot the indicator unexpectedly
iPhone: swipe down to Control Center, tap the indicator dot to see which app used it. Android: tap the status bar icon or check the Privacy Dashboard's timeline for the same information.
Combined with a periodic audit, these indicators make it easy to catch and revoke access you no longer want — see our smartphone security guide for the broader picture on device and account protection.